(可直接跳转至原文查看,因为作者会实时更新美化教程,故推荐直接访问原文查看,本文只做保留即可,如若侵权,请联系我,进行删除等处理。)
给大家安利一个免费且实用的计算机知识刷题(面经大全)网站,👉点击跳转到网站 。
hexo-theme-butterfly 主题是基于 hexo-theme-melody 的基础上进行开发的。
Butterfly 主题安装
在你的 Hexo 根目录里执行:
1 git clone -b master https://github.com/jerryc127/hexo-theme-butterfly.git themes/butterfly
升级方法:在主題目录下,进行 git pull
应用主题 修改 Hexo 根目录下的 _config.yml,把主题改为 butterfly:
安装插件 如果你没有 pug 以及 stylus 的渲染器,请下载安装:
1 npm install hexo-renderer-pug hexo-renderer-stylus --save
升级建议 为了减少升级主题后带来的不便,请使用以下方法:
在 hexo 的根目录创建一个文件 _config.butterfly.yml,并把主题目录的 _config.yml 内容复制到 _config.butterfly.yml 去,以后只需要在 _config.butterfly.yml 进行配置就行。
鉴于每个人的根目录名称都不一样,本帖博客根目录 一律以 [Blogroot] 指代。
本帖涉及魔改源码的内容,会使用 diff 代码块标识 ,复制时请不要忘记删除前面的 +、 - 符号。
因为 .pug 和 .styl 以及 .yml 等对缩进要求较为严格,请尽量 不要使用记事本等无法提供语法高亮的文本编辑器 进行修改。博主同款编辑器的安装配置教程请参看:Atom 插件安装和推荐
本帖基于 Butterfly 主题进行魔改方案编写,因此请读者优先掌握 Butterfly 主题官方文档 的内容后再来进行魔改。以避免不必要的兼容性问题。
Butterfly 主题美化 生成文章唯一链接 Hexo的默认文章链接格式是年,月,日,标题这种格式来生成的。如果你的标题是中文的话,那你的URL链接就会包含中文,
复制后的URL路径就是把中文变成了一大堆字符串编码,如果你在其他地方用这边文章的url链接,偶然你又修改了改文章的标题,那这个URL链接就会失效。为了给每一篇文章来上一个属于自己的链接,写下此教程,利用 hexo-abbrlink 插件,A Hexo plugin to generate static post link based on post titles ,来解决这个问题。 参考github官方: hexo-abbrlink 按照此教程配置完之后如下:
1、安装插件,在博客根目录 [Blogroot] 下打开终端,运行以下指令:
1 npm install hexo-abbrlink --save
2、插件安装成功后,在根目录 [Blogroot] 的配置文件 _config.yml 找到 permalink:
1
2
3
4
5
6
- permalink: :year/:month/:day/:title/ #修改为 + permalink: post/:abbrlink.html # post为自定义前缀 + abbrlink: + alg: crc32 #算法: crc16(default) and crc32 + rep: hex #进制: dec(default) and hex
代码样式
代码块中的所有功能只适用于 Hexo 自带的代码渲染。如果使用第三方的渲染器,不一定会有效
代码高亮主题 Butterfly 支持6种代码高亮样式:
darker
pale night
light
ocean
mac
mac light
修改主题配置文件 _config.butterfly.yml
代码复制 主题支持代码复製功能
修改 主题配置文件
代码高度限制
3.7.0 及以上支持
顶部图
配置
解释
index_img
主页的 top_img
default_top_img
默认的 top_img,当页面的 top_img 没有配置时,会显示 default_top_img
archive_img
归档页面的 top_img
tag_img
tag 子页面 的 默认 top_img
tag_per_img
tag 子页面的 top_img,可配置每个 tag 的 top_img
category_img
category 子页面 的 默认 top_img
category_per_img
category 子页面的 top_img,可配置每个 category 的 top_img
修改主题配置文件 _config.butterfly.yml
其它页面 (tags/categories/自建页面)和文章页的 top_img ,请到对应的 md 页面设置 front-matter 中的 top_img
tag_per_img 和 category_per_img 是 3.2.0 新增的内容,可对 tag 和 category 进行单独的配置
并不推荐为每个 tag 和每个 category 都配置不同的顶部图,因为配置太多会拖慢生成速度
1
2
3
4
5
6
7
tag_per_img: aplayer: https://xxxxxx.png android: ddddddd.png category_per_img: 随想: hdhdh.png 推荐: ddjdjdjd.png
修改主题配置文件 _config.butterfly.yml
打字效果 打字效果 activate-power-mode
修改主题配置文件 _config.butterfly.yml
1 2 3 4 5 6 7 activate_power_mode: enable: true colorful: true shake: true mobile: false
背景特效
好看的彩带背景,可設置每次刷新更換彩带,或者每次點擊更換彩带_config.butterfly.yml
1 2 3 4 5 6 7 canvas_ribbon: enable: false size: 150 alpha: 0.6 zIndex: -1 click_to_change: false mobile: false
相关配置可查看 canvas_ribbon
鼠标点击效果
zIndex建议只在-1和9999上选-1 代表烟火效果在底部9999 代表烟火效果在前面
修改主题配置文件 _config.butterfly.yml
1 2 3 4 fireworks: enable: true zIndex: 9999 mobile: false
网站副标题 可设置主页中展示的网站副标题或者自己喜欢的座右铭
修改主题配置文件 _config.butterfly.yml
1 2 3 4 5 6 7 8 9 10 11 12 13 14 15 16 17 18 19 20 21 title: Hexo subtitle: enable: true effect: true loop: true sub: - 我双手合十的愿望里永远有你。 - 穿越人海,只为与你相拥。 - 手握日月摘 ♥ 陈。
预览见本站主页:haiyong.site
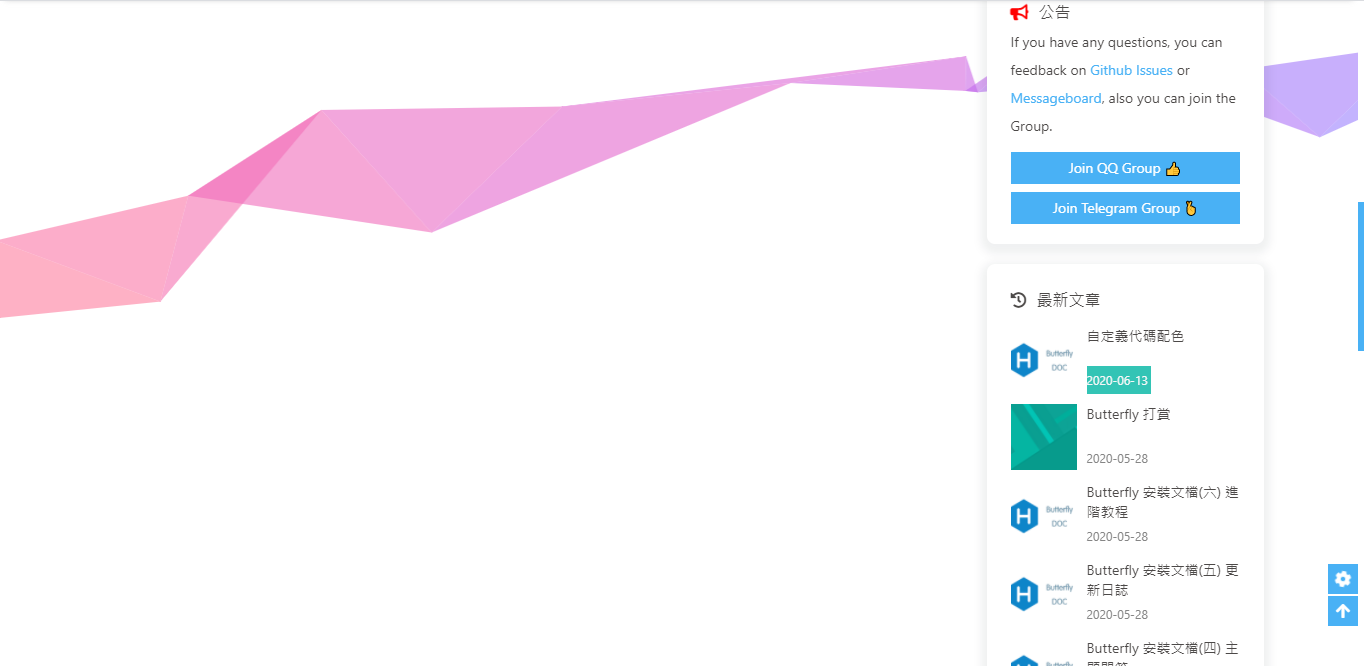
侧边栏设置 侧边排版 可自行决定哪个项目需要显示,可决定位置,也可以设置不显示侧边栏。
修改主题配置文件 _config.butterfly.yml
1 2 3 4 5 6 7 8 9 10 11 12 13 14 15 16 17 18 19 20 21 22 23 24 25 26 27 28 29 30 31 32 33 34 35 36 37 38 39 40 41 42 43 44 45 46 47 48 49 50 aside: enable: true hide: false button: true mobile: false position: right card_author: enable: true description: 手握日月摘心陈 button: enable: true icon: iconfont icon-youxishoubing text: 摸鱼 link: https://haiyong.site/moyu/ card_announcement: enable: true content: <b><font color="#e66b6d">双</font> <font color="#e66d98">手</font> <font color="#e66cc6">合</font> <font color="#cc6de6">十</font> <font color="#9770e6">成</font> <font color="#6d93e6">为</font> <font color="#6fcde6">自</font> <font color="#72e6b6">己</font> <font color="#72e689">的</font> <font color="#99e670">神</font>, <font color="#cde670">自</font> <font color="#e6df72">己</font> <font color="#e6c073">所</font> <font color="#e6a271">信</font> <font color="#e6796f">念</font> <font color="#e65454">的</font> <font color="#e63333">即</font> <font color="#e62c2c">是</font> <font color="#e60101">信</font> <font color="#e60101">仰</font></b> <p align="center"><img src="https://haiyong.site/img/img-blog.csdnimg.cn/f7384c88956d4378b72e47548e19c9f8.gif" width="50" alt="mao"></p> <p align="center">微信号:wh18363</p> <p align="center">QQ号:1836360247</p> card_recent_post: enable: true limit: 5 sort: date sort_order: card_categories: enable: true limit: 8 expand: none sort_order: card_tags: enable: true limit: 40 color: true sort_order: card_archives: enable: true type: monthly format: MMMM YYYY order: -1 limit: 8 sort_order: card_webinfo: enable: true post_count: true last_push_date: true sort_order: card_tags color: true
访问人数 busuanzi (UV 和 PV) 访问 busuanzi 的官方网站 查看更多的介绍。
修改主题配置文件 _config.butterfly.yml
1 2 3 4 busuanzi: site_uv: true site_pv: true page_pv: true
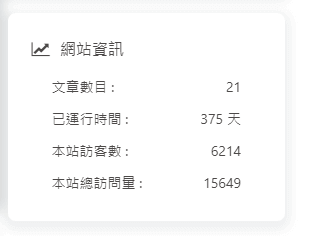
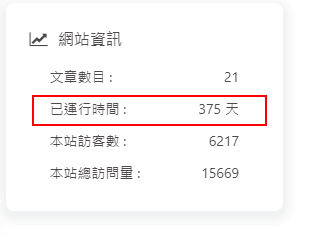
运行时间 网页已运行时间
修改主题配置文件 _config.butterfly.yml
1 2 3 4 5 6 runtimeshow: enable: true publish_date: 6 /7/2018 00 :00:00
侧边栏时钟 (转载自:安知鱼 ) 1、如果有安装店长的插件版侧边栏电子钟(与店长的电子钟冲突),在博客根目录[Blogroot]下打开终端,运行以下指令
1 2 npm uninstall hexo-butterfly-clock
2、安装插件,在博客根目录[Blogroot]下打开终端,运行以下指令:
1 npm install hexo-butterfly-clock-anzhiyu --save
3、添加配置信息,以下为写法示例在站点配置文件_config.yml或者主题配置文件_config.butterfly.yml中添加
1 2 3 4 5 6 7 8 9 10 11 12 13 14 15 16 17 18 19 20 21 22 electric_clock: enable: true priority: 5 enable_page: all exclude: layout: type: class name: sticky_layout index: 0 loading: https://cdn.cbd.int/hexo-butterfly-clock-anzhiyu/lib/loading.gif clock_css: https://cdn.cbd.int/hexo-butterfly-clock-anzhiyu/lib/clock.min.css clock_js: https://cdn.cbd.int/hexo-butterfly-clock-anzhiyu/lib/clock.min.js ip_api: https://widget.qweather.net/simple/static/js/he-simple-common.js?v=2.0 qweather_key: gaud_map_key: default_rectangle: false rectangle: 112.982279 ,28.19409
其中 qweather_key 和 gaud_map_key 最好自己去申请对应的 api key,默认使用安知鱼的,可能会被限制,不保证可靠性
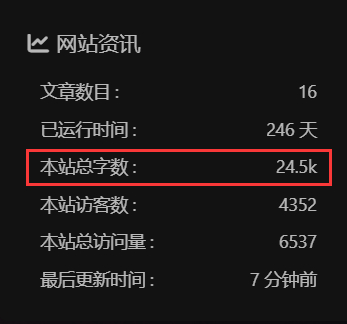
字数统计 要为 Butterfly 配上字数统计特性, 你需要如下几个步骤:
打开 hexo 工作目录
npm install hexo-wordcount —save or yarn add hexo-wordcount
修改主题配置文件 _config.butterfly.yml
1 2 3 4 5 wordcount: enable: true post_wordcount: true min2read: true total_wordcount: true
公告2个小人 1、在 Butterfly/layout/includes/widget/card_announcement.pug 下添加如下代码:
1 2 3 4 5 6 7 8 9 10 11 12 13 14 15 16 17 18 .xpand (style='height:200px;' ) canvas.illo (width='800' height='800' style='max-width: 200px; max-height: 200px; touch-action: none; width: 640px; height: 640px;' ) script (src='https://fastly.jsdelivr.net/gh/xiaopengand/blogCdn@latest/xzxr/twopeople1.js' )script (src='https://fastly.jsdelivr.net/gh/xiaopengand/blogCdn@latest/xzxr/zdog.dist.js' )script#rendered-js (src='https://fastly.jsdelivr.net/gh/xiaopengand/blogCdn@latest/xzxr/twopeople.js' ) style. .card -widget.card -announcement { margin : 0 ; align-items : center; justify-content : center; text-align : center; } canvas { display : block; margin : 0 auto; cursor : move; }
星空背景和流星特效 1、在 [Blogroot]\themes\source\js\ 目录下新建 universe.js 输入:
1 2 function dark (window .requestAnimationFrame =window .requestAnimationFrame ||window .mozRequestAnimationFrame ||window .webkitRequestAnimationFrame ||window .msRequestAnimationFrame ;var n,e,i,h,t=.05 ,s=document .getElementById ("universe" ),o=!0 ,a="180,184,240" ,r="226,225,142" ,d="226,225,224" ,c=[];function f (window .innerWidth ,e=window .innerHeight ,i=.216 *n,s.setAttribute ("width" ,n),s.setAttribute ("height" ,e)}function u (clearRect (0 ,0 ,n,e);for (var t=c.length ,i=0 ;i<t;i++){var s=c[i];s.move (),s.fadeIn (),s.fadeOut (),s.draw ()}}function y (this .reset =function (this .giant =m (3 ),this .comet =!this .giant &&!o&&m (10 ),this .x =l (0 ,n-10 ),this .y =l (0 ,e),this .r =l (1.1 ,2.6 ),this .dx =l (t,6 *t)+(this .comet +1 -1 )*t*l (50 ,120 )+2 *t,this .dy =-l (t,6 *t)-(this .comet +1 -1 )*t*l (50 ,120 ),this .fadingOut =null ,this .fadingIn =!0 ,this .opacity =0 ,this .opacityTresh =l (.2 ,1 -.4 *(this .comet +1 -1 )),this .do =l (5e-4 ,.002 )+.001 *(this .comet +1 -1 )},this .fadeIn =function (this .fadingIn &&(this .fadingIn =!(this .opacity >this .opacityTresh ),this .opacity +=this .do )},this .fadeOut =function (this .fadingOut &&(this .fadingOut =!(this .opacity <0 ),this .opacity -=this .do /2 ,(this .x >n||this .y <0 )&&(this .fadingOut =!1 ,this .reset ()))},this .draw =function (if (h.beginPath (),this .giant )h.fillStyle ="rgba(" +a+"," +this .opacity +")" ,h.arc (this .x ,this .y ,2 ,0 ,2 *Math .PI ,!1 );else if (this .comet ){h.fillStyle ="rgba(" +d+"," +this .opacity +")" ,h.arc (this .x ,this .y ,1.5 ,0 ,2 *Math .PI ,!1 );for (var t=0 ;t<30 ;t++)h.fillStyle ="rgba(" +d+"," +(this .opacity -this .opacity /20 *t)+")" ,h.rect (this .x -this .dx /4 *t,this .y -this .dy /4 *t-2 ,2 ,2 ),h.fill ()}else h.fillStyle ="rgba(" +r+"," +this .opacity +")" ,h.rect (this .x ,this .y ,this .r ,this .r );h.closePath (),h.fill ()},this .move =function (this .x +=this .dx ,this .y +=this .dy ,!1 ===this .fadingOut &&this .reset (),(this .x >n-n/4 ||this .y <0 )&&(this .fadingOut =!0 )},setTimeout (function (1 },50 )}function m (t ){return Math .floor (1e3 *Math .random ())+1 <10 *t}function l (t,i ){return Math .random ()*(i-t)+t}f (),window .addEventListener ("resize" ,f,!1 ),function (getContext ("2d" );for (var t=0 ;t<i;t++)c[t]=new y,c[t].reset ();u ()}(),function t (document .getElementsByTagName ('html' )[0 ].getAttribute ('data-theme' )=='dark' &&u (),window .requestAnimationFrame (t)}()};dark ()
2、在 [Blogroot]\themes\source\css\ 目录下新建 universe.css 输入:
1 2 3 4 5 6 7 8 9 10 11 12 13 14 15 16 #universe { display : block; position : fixed; margin : 0 ; padding : 0 ; border : 0 ; outline : 0 ; left : 0 ; top : 0 ; width : 100% ; height : 100% ; pointer-events : none; z-index : -1 ; }
3、在 [Blogroot]\_config.butterfly.yml 的 inject 配置项中 bottom 下填入:
1 2 3 4 5 inject: bottom: + # 星空背景 + - <canvas id="universe"></canvas> + - <script defer src="/js/universe.js"></script>
4、在 [Blogroot]\_config.butterfly.yml 的 inject 配置项中 head 下填入:
1 2 3 4 5 inject: head: + ## 星空背景 + - <link rel="stylesheet" href="/css/universe.css">
昼夜转换动画 1、新建 [Blogroot]\themes\butterfly\layout\includes\custom\sun_moon.pug, 这部分其实实质上就是一个 svg 文件,通过 js 操作它的旋转显隐,淡入淡出实现动画效果。
1 2 3 4 5 6 7 8 9 10 svg(aria-hidden='true', style='position:absolute; overflow:hidden; width:0; height:0') symbol#icon-sun(viewBox='0 0 1024 1024') path(d='M960 512l-128 128v192h-192l-128 128-128-128H192v-192l-128-128 128-128V192h192l128-128 128 128h192v192z', fill='#FFD878', p-id='8420') path(d='M736 512a224 224 0 1 0-448 0 224 224 0 1 0 448 0z', fill='#FFE4A9', p-id='8421') path(d='M512 109.248L626.752 224H800v173.248L914.752 512 800 626.752V800h-173.248L512 914.752 397.248 800H224v-173.248L109.248 512 224 397.248V224h173.248L512 109.248M512 64l-128 128H192v192l-128 128 128 128v192h192l128 128 128-128h192v-192l128-128-128-128V192h-192l-128-128z', fill='#4D5152', p-id='8422') path(d='M512 320c105.888 0 192 86.112 192 192s-86.112 192-192 192-192-86.112-192-192 86.112-192 192-192m0-32a224 224 0 1 0 0 448 224 224 0 0 0 0-448z', fill='#4D5152', p-id='8423') symbol#icon-moon(viewBox='0 0 1024 1024') path(d='M611.370667 167.082667a445.013333 445.013333 0 0 1-38.4 161.834666 477.824 477.824 0 0 1-244.736 244.394667 445.141333 445.141333 0 0 1-161.109334 38.058667 85.077333 85.077333 0 0 0-65.066666 135.722666A462.08 462.08 0 1 0 747.093333 102.058667a85.077333 85.077333 0 0 0-135.722666 65.024z', fill='#FFB531', p-id='11345') path(d='M329.728 274.133333l35.157333-35.157333a21.333333 21.333333 0 1 0-30.165333-30.165333l-35.157333 35.157333-35.114667-35.157333a21.333333 21.333333 0 0 0-30.165333 30.165333l35.114666 35.157333-35.114666 35.157334a21.333333 21.333333 0 1 0 30.165333 30.165333l35.114667-35.157333 35.157333 35.157333a21.333333 21.333333 0 1 0 30.165333-30.165333z', fill='#030835', p-id='11346')
2、新建 [Blogroot]\themes\butterfly\source\css\layout\sun_moon.styl:
1 2 3 4 5 6 7 8 9 10 11 12 13 14 15 16 17 18 19 20 21 22 23 24 25 26 27 28 29 30 31 32 33 34 35 36 37 38 39 40 41 42 43 44 45 46 47 48 49 50 51 52 53 54 55 56 57 58 59 60 61 62 63 64 65 66 67 68 69 70 71 72 .Cuteen_DarkSky ,.Cuteen_DarkSky :before content '' position fixed left 0 right 0 top 0 bottom 0 z-index 88888888 .Cuteen_DarkSky background linear-gradient (#feb8b0 , #fef9db ) &:before transition 2s ease all opacity 0 background linear-gradient (#4c3f6d , #6c62bb , #93b1ed ) .DarkMode .Cuteen_DarkSky &:before opacity 1 .Cuteen_DarkPlanet z-index 99999999 position fixed left -50% top -50% width 200% height 200% -webkit-animation CuteenPlanetMove 2s cubic-bezier (0.7 , 0 , 0 , 1 ) animation CuteenPlanetMove 2s cubic-bezier (0.7 , 0 , 0 , 1 ) transform-origin center bottom @-webkit-keyframes CuteenPlanetMove { 0% { transform : rotate (0 ); } to { transform : rotate (360deg ); } } @keyframes CuteenPlanetMove { 0% { transform : rotate (0 ); } to { transform : rotate (360deg ); } } .Cuteen_DarkPlanet &:after position absolute left 35% top 40% width 9.375rem height 9.375rem border-radius 50% content '' background linear-gradient (#fefefe , #fffbe8 ) .search span display none .menus_item a text-decoration none!important .icon-V padding 5px
3、新建 [Blogroot]\themes\butterfly\source\js\sun_moon.js, 去除了冗余代码,去 jquery:
1 2 3 4 5 6 7 8 9 10 11 12 13 14 15 16 17 18 19 20 21 22 23 24 25 26 27 28 29 function switchNightMode ( document .querySelector ('body' ).insertAdjacentHTML ('beforeend' , '<div class="Cuteen_DarkSky"><div class="Cuteen_DarkPlanet"></div></div>' ), setTimeout (function ( document .querySelector ('body' ).classList .contains ('DarkMode' ) ? (document .querySelector ('body' ).classList .remove ('DarkMode' ), localStorage .setItem ('isDark' , '0' ), document .getElementById ('modeicon' ).setAttribute ('xlink:href' , '#icon-moon' )) : (document .querySelector ('body' ).classList .add ('DarkMode' ), localStorage .setItem ('isDark' , '1' ), document .getElementById ('modeicon' ).setAttribute ('xlink:href' , '#icon-sun' )), setTimeout (function ( document .getElementsByClassName ('Cuteen_DarkSky' )[0 ].style .transition = 'opacity 3s' ; document .getElementsByClassName ('Cuteen_DarkSky' )[0 ].style .opacity = '0' ; setTimeout (function ( document .getElementsByClassName ('Cuteen_DarkSky' )[0 ].remove (); }, 1e3 ); }, 2e3 ) }) const nowMode = document .documentElement .getAttribute ('data-theme' ) === 'dark' ? 'dark' : 'light' if (nowMode === 'light' ) { activateDarkMode () saveToLocal.set ('theme' , 'dark' , 2 ) GLOBAL_CONFIG .Snackbar !== undefined && btf.snackbarShow (GLOBAL_CONFIG .Snackbar .day_to_night ) document .getElementById ('modeicon' ).setAttribute ('xlink:href' , '#icon-sun' ) } else { activateLightMode () saveToLocal.set ('theme' , 'light' , 2 ) document .querySelector ('body' ).classList .add ('DarkMode' ), document .getElementById ('modeicon' ).setAttribute ('xlink:href' , '#icon-moon' ) } typeof utterancesTheme === 'function' && utterancesTheme () typeof FB === 'object' && window .loadFBComment () window .DISQUS && document .getElementById ('disqus_thread' ).children .length && setTimeout (() => window .disqusReset (), 200 ) }
4、修改 [Blogroot]\themes\butterfly\layout\includes\head.pug, 在文件末位加上一行:
1 2 3 4 5 6 7 8 9 10 11 //- global config !=partial('includes/head/config', {}, {cache: true}) include ./head/config_site.pug include ./head/noscript.pug !=fragment_cache('injectHeadJs', function(){return inject_head_js()}) !=fragment_cache('injectHead', function(){return injectHtml(theme.inject.head)}) + include ./custom/sun_moon.pug
5、修改 [Blogroot]\themes\butterfly\layout\includes\rightside.pug, 把原本的昼夜切换按钮替换掉:
1 2 3 4 5 6 7 8 9 10 11 when 'translate' if translate.enable button#translateLink(type="button" title=_p('rightside.translate_title'))= translate.default when 'darkmode' if darkmode.enable && darkmode.button - button#darkmode(type="button" title=_p('rightside.night_mode_title')) - i.fas.fa-adjust + a.icon-V.hidden(onclick='switchNightMode()', title=_p('rightside.night_mode_title')) + svg(width='25', height='25', viewBox='0 0 1024 1024') + use#modeicon(xlink:href='#icon-moon')
6、修改 [Blogroot]_config.butterfly.yml, 引入一下 js:
1 2 3 4 inject: head: bottome: - <script src="/js/sun_moon.js" async></script>
7、具体效果就自己切换下夜间模式看看吧。
引入 Aplayer 播放音乐 1、在博客根目录 [Blogroot] 下打开终端,运行以下指令安装 hexo-tag-aplayer 插件:
1 npm install hexo-tag-aplayer --save
2、在站点配置文件 [Blogroot]\_config.yml 中新增配置项,建议直接加在最底下:
1 2 3 4 5 aplayer: meting: true asset_inject: false
3、修改主题配置文件 [Blogroot]\_config.butterfly.yml 中关于 Aplayer 的配置内容:
1 2 3 4 aplayerInject: enable: true per_page: true
4、在主题配置文件 [Blogroot]\_config.butterfly.yml 的 inject 配置项中添加 Aplayer 的容器。
1 2 3 4 inject: head: bottom: - <div class="aplayer no -destroy" data-id="5183531430" data-server="netease" data-type="playlist" data-fixed="true" data-mini="true" data-listFolded="false" data-order="random" data-preload="none" data-autoplay="false" muted></div>
5、在博客根目录 [Blogroot] 下打开终端,运行以下指令:
1 2 3 hexo clean hexo generate hexo server
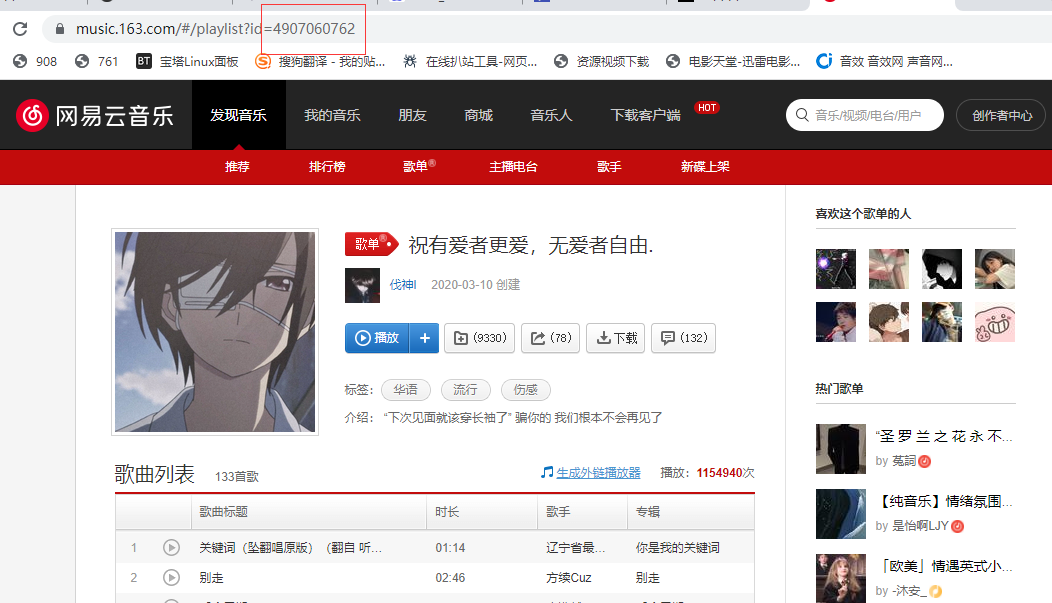
6、关于更换歌单的问题,大部分同学都因为只更改了 data-id 的值,所以出现歌单加载不出的情况,此处需要注意,data-id 、data-server 、data-type 分别对应了歌单的id,歌单的服务商、歌单的类型(感觉自己说了废话),所以需要确认这三项是一一对应的。
如图中所示,找到网易云歌单的 url,https://music.163.com/#/playlist?id=4907060762, 此处的 palylist 对应的就是 data-type 的值,id 就是 data-id 的值,而网易云的 data-server 为 netease ,这个可以通过 Aplayer 的插件文档查阅到。 只有三个参数对应正确才能正常加载歌单。
7、Aplayer 的网易云歌单接口时不时的会挂掉,所以如果你确定你配置正确,但是歌单还是没有出现。不妨去看看其他人的站点是不是也没有 Aplayer 标签了来判断是 Aplayer 本身接口的问题还是自己配置出错的问题。
8、配置成功后会发现 Aplayer 的吸底标签一直占据着左下角的一片空间,对手机端阅读不太友好,可以添加一下 CSS 样式使其自动缩进隐藏。在 [Blogroot]\themes\butterfly\source\css\custom.css 中 (没有这个文件就按照路径自己新建) 添加如下内容:
1 2 3 4 5 6 7 8 9 10 .aplayer .aplayer-fixed .aplayer-narrow .aplayer-body { left : -66px !important ; } .aplayer .aplayer-fixed .aplayer-narrow .aplayer-body :hover { left : 0 !important ; }
9、不要忘了到主题配置文件引入自定义样式,修改 [Blogroot]_config.butterfly.yml 的 inject 配置项:
1
2
3
4
5
inject: head: + - <link rel="stylesheet" href="/css/custom.css" media="defer" onload="this.media='all'"> bottom: - <div class="aplayer no-destroy" data-id="5183531430" data-server="netease" data-type="playlist" data-fixed="true" data-mini="true" data-listFolded="false" data-order="random" data-preload="none" data-autoplay="false" muted></div>
10.运行 Hexo 就可以看到网页左下角出现了 Aplayer (补充!)
最后,如果你想切换页面时,音乐不会中断。请把主题配置文件的 pjax 设为 true
在主题_config.butterfly.yml或/them/butterfly/__config.yml中找到pajx,修改为以下内容:
1 2 3 pjax: enable : true exclude:
引入阿里矢量图标库 阿里图标库全名阿里巴巴矢量图标库。提供了丰富的免费图标资源。并且支持多种引入方式。
新建图标项目 1、访问 阿里巴巴矢量图标库 , 注册登录。
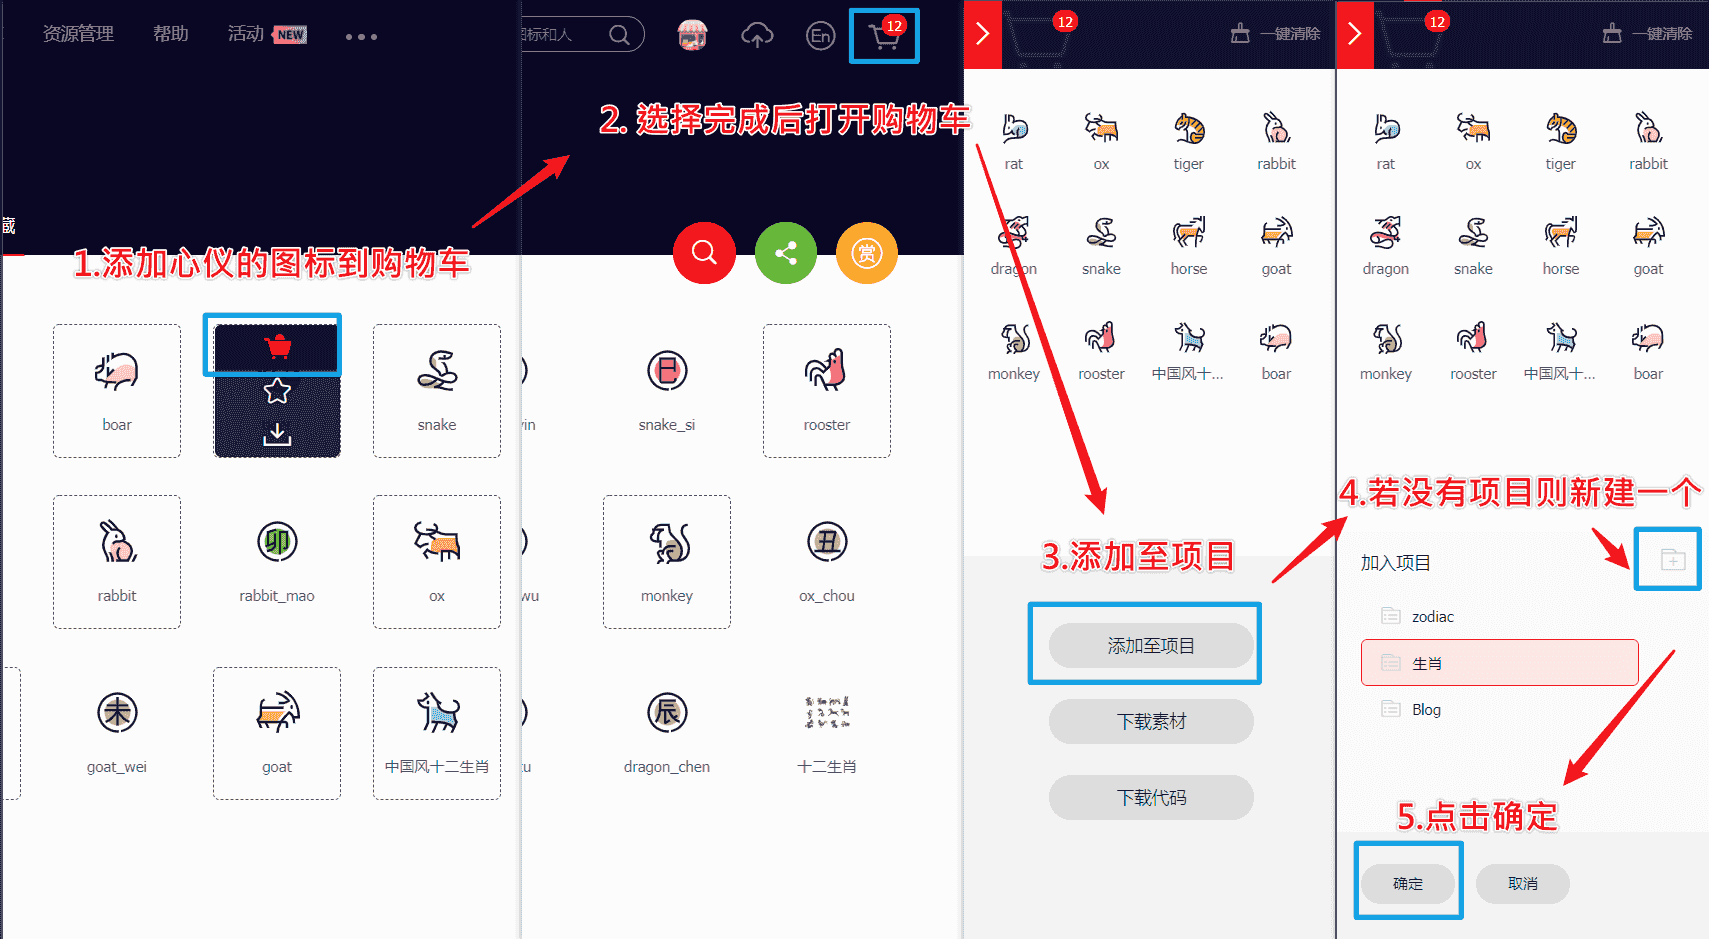
2、搜索自己心仪的图标,然后选择添加入库,加到购物车。
3、选择完毕后点击右上角的购物车图标,打开侧栏,选择添加到项目,如果没有项目就新建一个。
4、可以通过上方顶栏菜单 -> 资源管理 -> 我的项目,找到之前添加的图标项目。
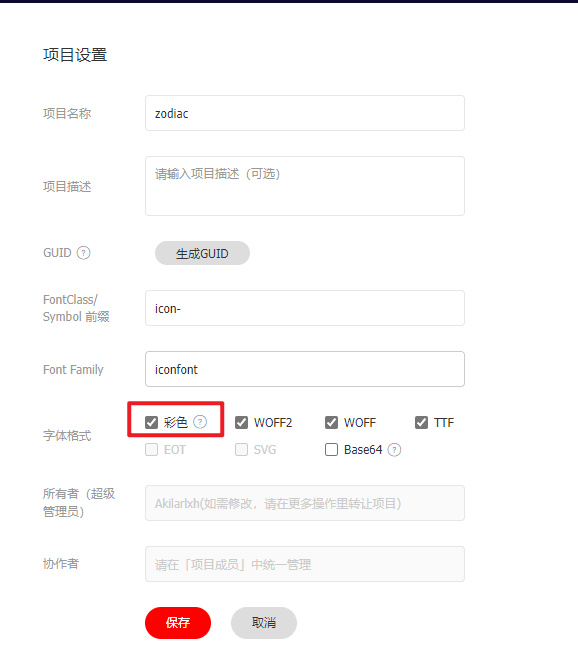
5、现在的 iconfont 可以在图标库的项目设置里直接打开彩色设置,然后采用 fontclass 的引用方式即可使用多彩图标。但是单一项目彩色图标上限是 40 个图标 ,酌情采用。
引入图标 1、找到之前新建的图标项目,选择Symbol->查看在线链接,获取 Symbol.js 的在线链接,并引入。在 [Blogroot]\_config.butterfly.yml 的 inject 配置项中填入:
1 2 3 4 inject: head: bottom: + - <script async src="//at.alicdn.com/t/font_2264842_3izu8i5eoc2.js"></script>
2、打开 [Blogroot]\themes\butterfly\source\css\custom.css, 输入以下内容:
1 2 3 4 5 6 7 svg.icon { width : 1em ; height : 1em ; vertical-align : -0.15em ; fill: currentColor; overflow : hidden; }
3、添加外挂标签,在 [Blogroot]\themes\butterfly\scripts\tag\ 目录下新建 iconfont.js,打开 [Blogroot]\themes\butterfly\scripts\tag\iconfont.js, 输入:
1 2 3 4 5 6 7 8 9 10 11 'use strict' ;function iconFont (args ) { args = args.join (' ' ).split (',' ) let p0 = args[0 ] let p1 = args[1 ]?args[1 ]:1 return `<svg class="icon" style="width:${p1} em; height:${p1} em" aria-hidden="true"><use xlink:href="#${p0} "></use></svg>` ; } hexo.extend .tag .register ('icon' ,iconFont);
hexo cl && hexo g 以后即可使用外挂标签的形式来写入图标了。
未完待续…
作者:海拥
文章来源:海拥 - 一个乐于分享技术与快乐的博主-摸鱼小游戏-计算机技术基础知识 (haiyong.site)
{再次说明:本文只做保留,方便日后对比查看,推荐到访问原作者文章查看!本文只做保留即可,如若侵权,请联系我,进行删除等处理。}
本站管理员-联系方式: 微信vx: hystart123 QQ:1691617546

 微信
微信 支付宝
支付宝